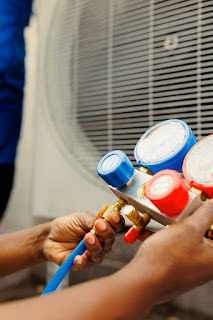
Why Refrigerant Won’t Charge After Compressor Replacement – Troubleshooting Guide
Common Reasons Why Refrigerant Can’t Enter After Compressor Replacement
When servicing an air conditioning or refrigeration system, one of the most frustrating situations is when refrigerant fails to enter the system after replacing the compressor. Below are the four most common causes, how to diagnose them, and recommended troubleshooting steps.
🔧 1. Internal System Blockage (Most Common Cause)
Possible causes:
-
Expansion valve or capillary tube blockage due to welding debris or residual refrigerant oil.
-
Clogged filter drier—desiccant expansion from moisture, or excessive use.
-
Welding slag or copper debris left inside piping during compressor replacement.
How to identify:
-
Pressure does not rise when charging refrigerant, or pressure readings are inconsistent.
-
Low-side pressure shows vacuum or negative pressure.
-
Compressor runs normally but refrigerant cannot enter.
🧯 2. Incomplete Vacuuming or Severe Leakage
Possible causes:
-
Inadequate vacuuming or air/moisture left inside the system leads to abnormal pressure.
-
Insufficient pressure differential prevents the compressor from drawing in refrigerant.
How to identify:
-
Use a vacuum gauge to check if the system holds negative pressure.
-
If pressure rises quickly after vacuuming, there may be a leak or incomplete vacuum.
-
Overheating of discharge pipe and unstable pressure after initial charging.
🔁 3. Compressor Wired Incorrectly (Reversed Rotation – 3-phase only)
Often found in commercial AC systems. Incorrect wiring may cause the compressor to run in reverse, failing to create the necessary pressure difference.
How to identify:
-
Abnormal sound or no vibration.
-
Refrigerant fails to be absorbed.
-
Try swapping any two phase wires to check for improvement.
🧪 4. Charging Equipment or Valve Failure
Possible causes:
-
Issues with vacuum pump, refrigerant tank, manifold gauge set, or quick couplers may prevent refrigerant from actually entering the system.
How to identify:
-
Touch copper joints to check for temperature changes.
-
Listen for refrigerant flow noise after opening tank valve.
-
Try using a different manifold gauge set for verification.
🛠 Recommended Troubleshooting Steps
-
Ensure the system passes vacuum testing and holds pressure.
-
Confirm refrigerant tank, tools, and hoses are functioning and fully charged.
-
Check for pressure difference and try slow-charging from the high-pressure side.
-
If refrigerant still doesn’t enter, consider internal blockage—segment testing or flushing may be needed.
📌 Professional Reminders
-
Always replace the filter drier and flush piping when replacing a compressor.
-
For R410A systems, special attention is required for charging technique and interpreting pressure differential.
-
Conduct nitrogen flushing + vacuuming + leak testing after welding to ensure system cleanliness and integrity.


Comments
Post a Comment